Your first week on the web app
A two-minute walkthrough from your verification email to your first sale, your first published storefront item, and your first follow-up.
Your first week on MatSmartShop (web), start to finish, in about two minutes.
Your first week on the web app: from the confirmation email to your first sale, your first published product, and your first follow-up text. Seven steps, in the order a brand-new shop actually does them — each links to the full manual that covers it in depth.
Worked examples in this pack use three of your own customers — Dozie, Adaora and Kenneth — the same names used across the rest of the manual set.
1. Confirm your email and sign in
The moment your shop is created, we send a verification email to the address you signed up with. Open it and click Verify Email Address.
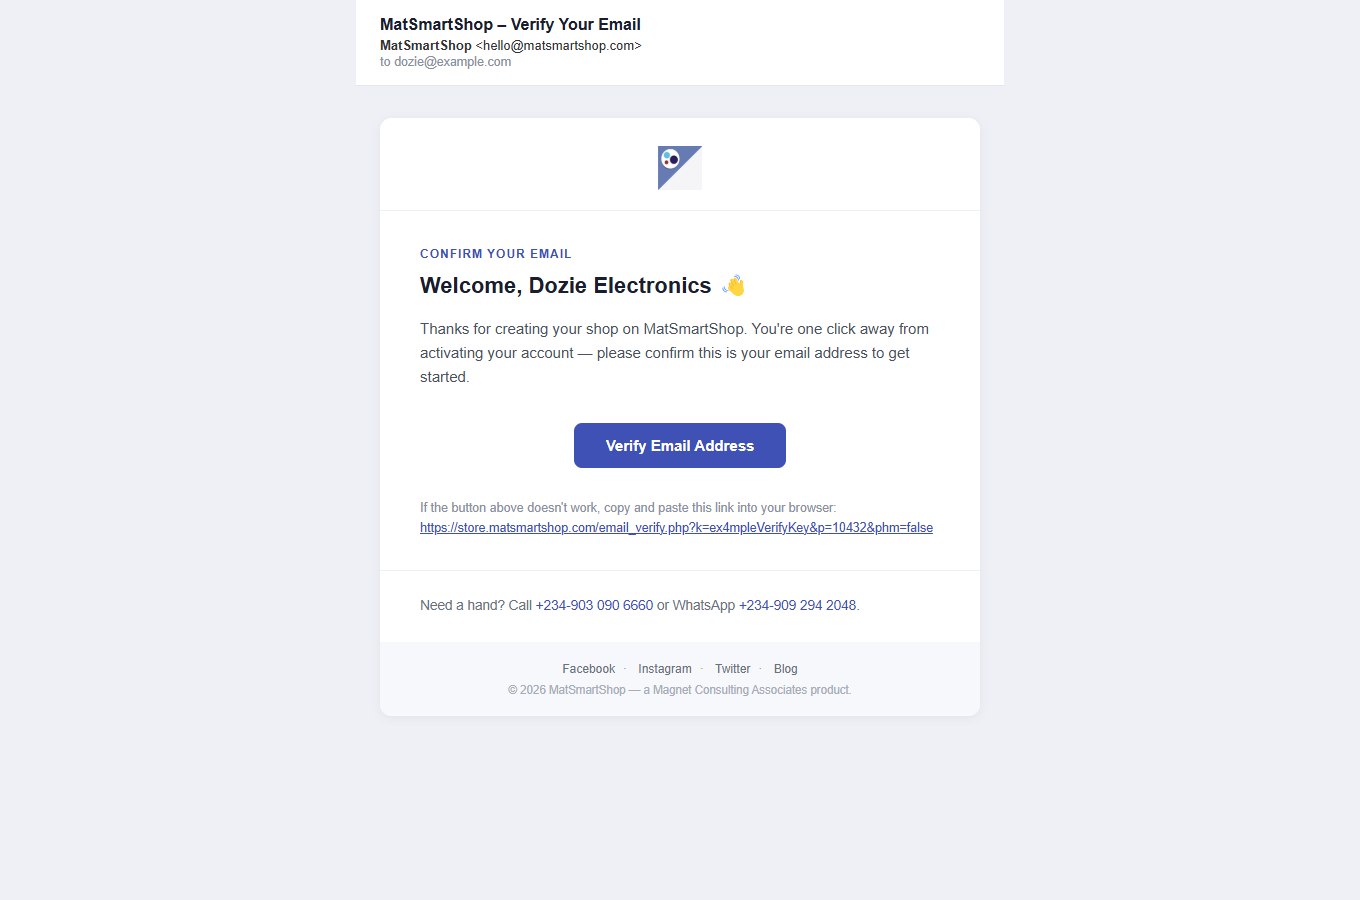
Clicking it confirms your address and drops you on the sign-in page with a message that verification succeeded. From there:
- Go to store.matsmartshop.com and sign in with the email and password you registered with.
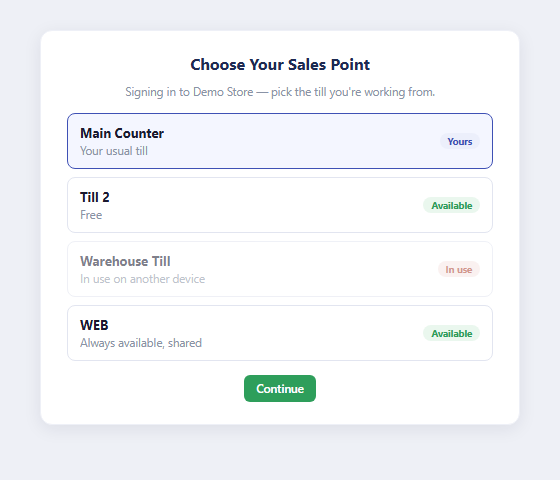
- If your account has more than one sales point, you'll land on Select Sales Point first — pick the one you're working from.
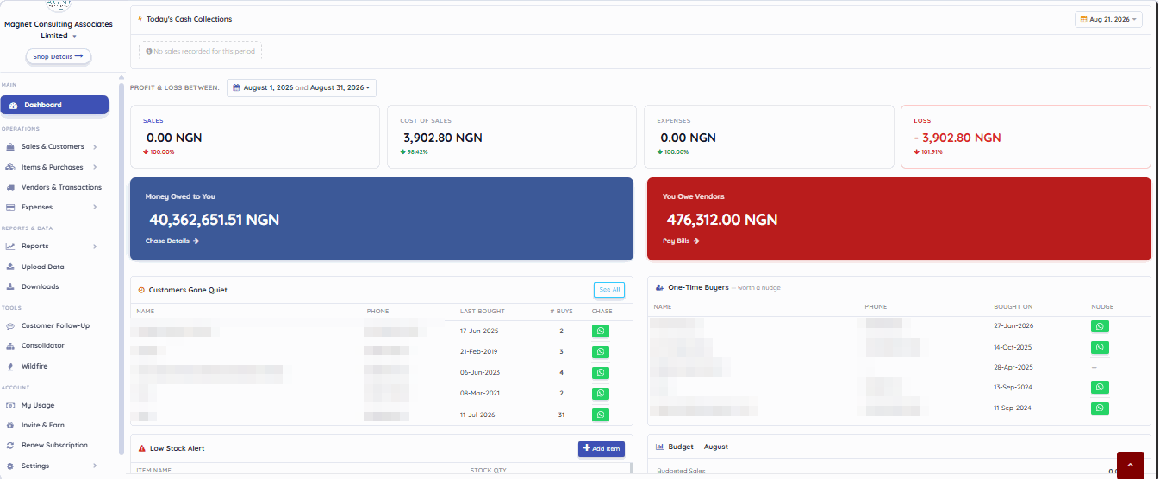
You'll land on the Dashboard — your home base. The left sidebar is where every step in this pack happens: Sales & Customers, Items & Purchases, Vendors & Transactions, Wildfire (your storefront) and Customer Follow-Up all live there.
2. Bring in your first customer
There's no separate “Add Customer” screen you need to visit first — the fastest way in is inline, right when you make a sale (Step 5). Open New Sale & Quotation and use the + beside the Customer field to create one without leaving the sale.
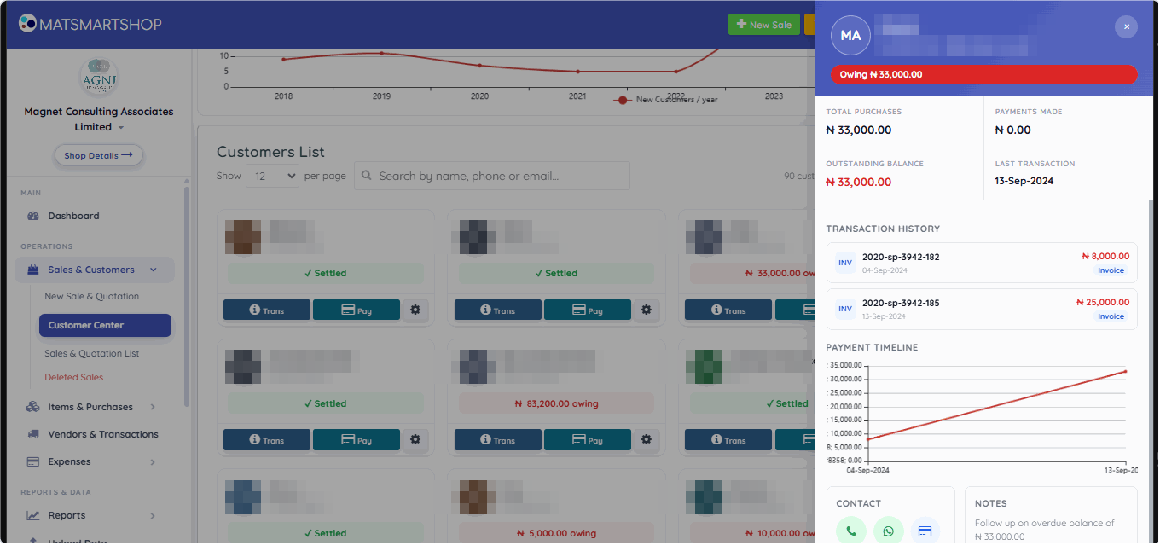
Everyone you add — however they were added — shows up in Sales & Customers → Customer Center, with their balance, purchase history and a payment timeline.
3. Bring in your first vendor
Unlike a customer, a vendor does get its own screen. Go to Vendors & Transactions and click Create Vendor.
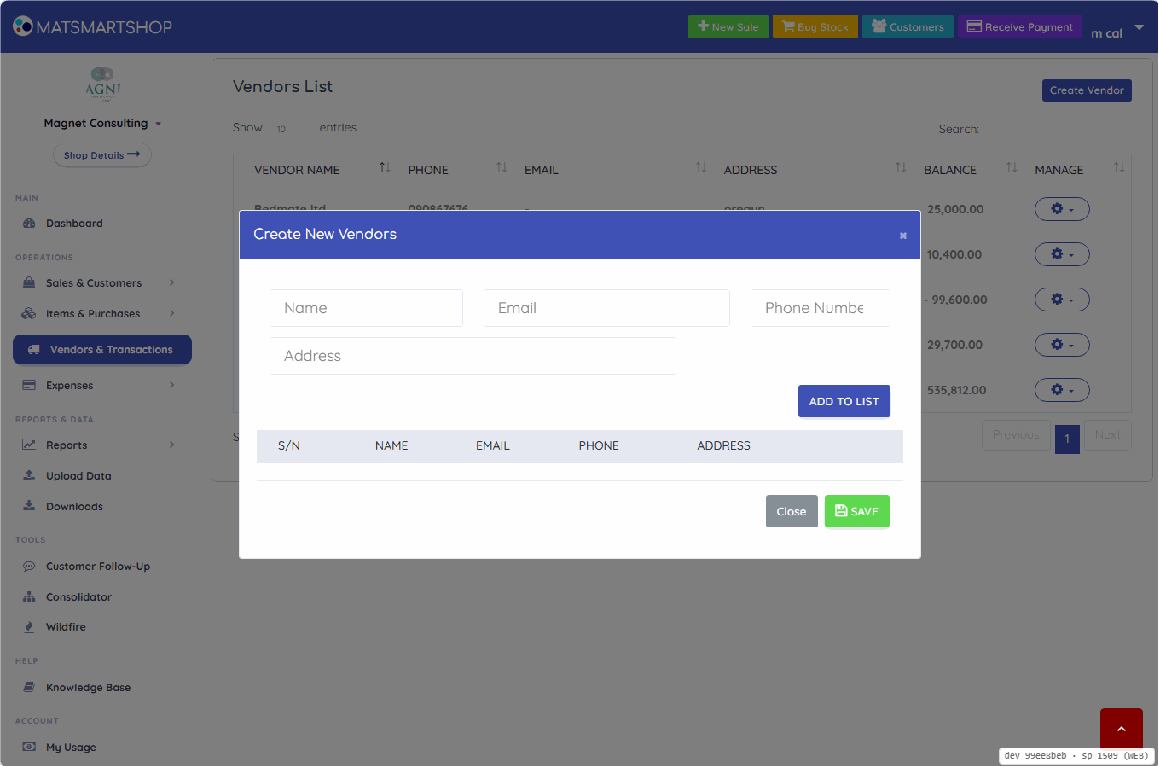
With the vendor created, record your first purchase from them in Items & Purchases → Purchase & Adjustment List → Record stock: choose Purchase, pick the vendor, add a line for each item on the bill, and untick Paid in full if you only paid part. Got the supplier's paper receipt? The Scan a paper tab reads it for you.
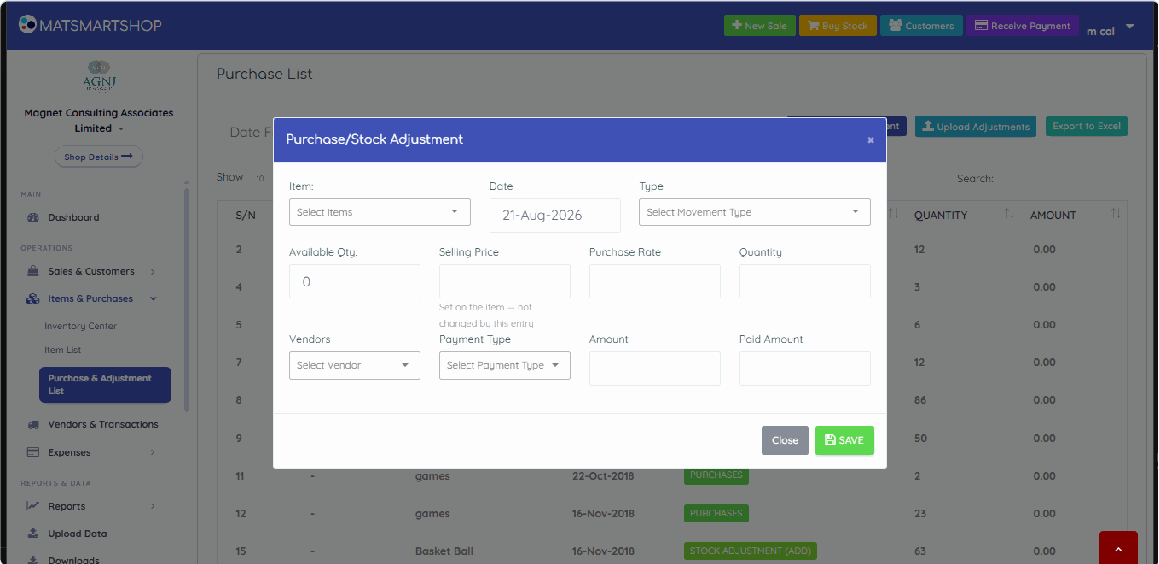
Set Type to PURCHASE (not an adjustment — that's a different thing, covered in the Items & Purchases Manual), pick the vendor, fill in quantity, purchase rate and how much you actually paid. Anything left unpaid becomes an outstanding balance you'll see on the Dashboard's You Owe Vendors card and under Vendors & Transactions.
4. Add your first item
Go to Items & Purchases → Inventory Center → Item List and click Create New Items.
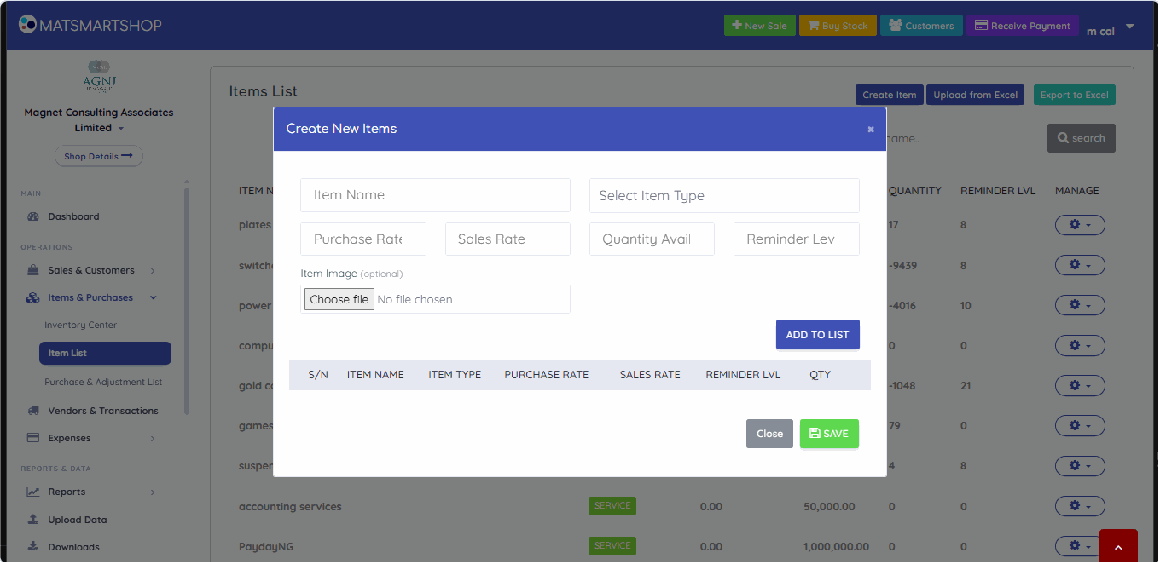
- Item Name, Purchase Rate (what it costs you) and Sales Rate (what you charge).
- Quantity Avail — only for stock that's on the shelf today. Anything arriving afterwards should come in as a purchase (Step 3) so the cost gets recorded properly.
- Item Image — worth adding now. It follows the item everywhere: the New Sale picker, and later the storefront listing in Step 6.
5. Create your first transaction
Open New Sale & Quotation (or the green + New Sale button, from anywhere).
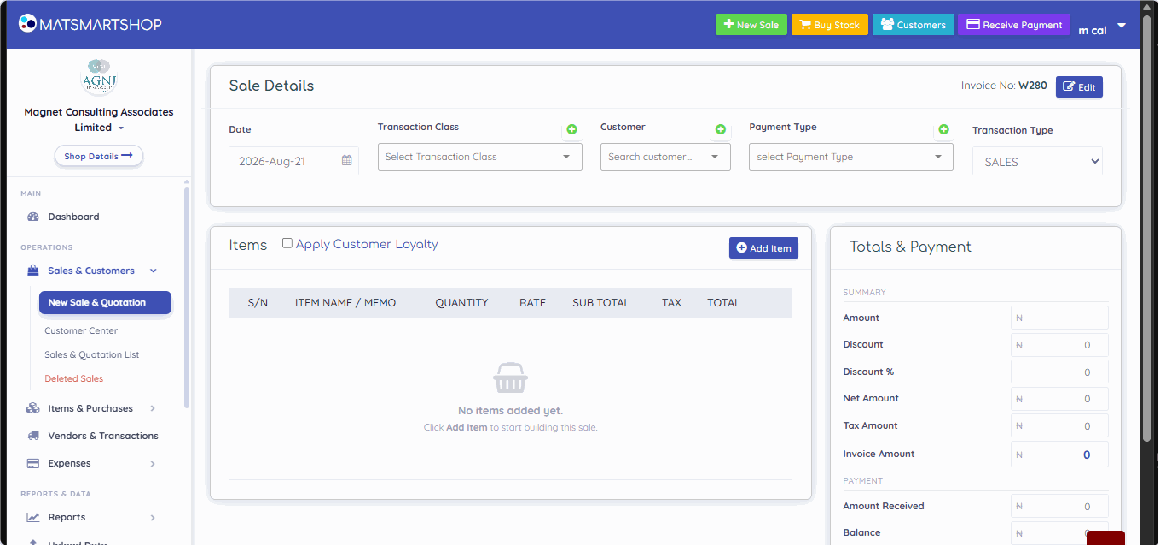
- Pick your Customer (the + creates one on the spot — this is Step 2, done inline), the Payment Type, and leave Transaction Type on SALES.
- Click Add Item, search for the item you just created, set the quantity, and confirm.
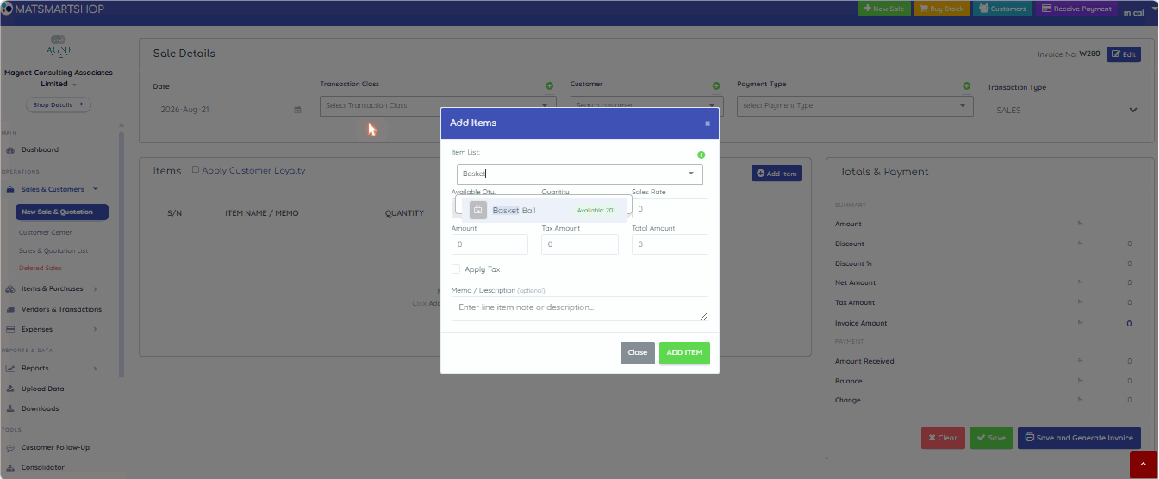
- Set Amount Received — the full amount for a cash sale, or less for a part payment. The Balance field shows what's still owed.
- Click Save and Generate Invoice.
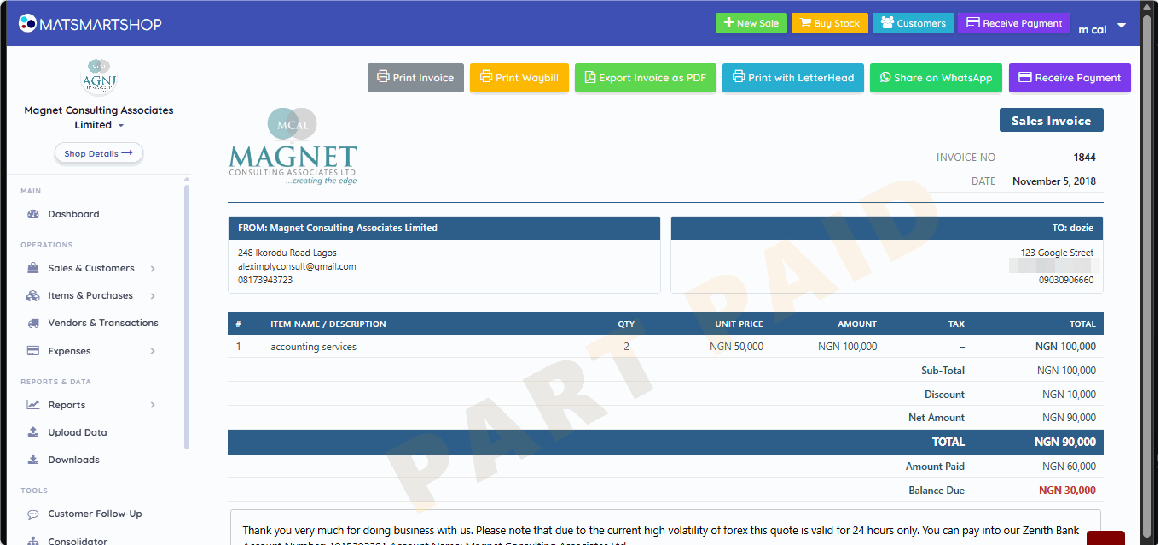
That's it — your first transaction is recorded, your stock has dropped, and if anything is still owed it will show up on the Dashboard and in Customer Center. Print Invoice, Export as PDF or Share on WhatsApp hands the customer their copy; Receive Payment is there whenever the rest comes in.
6. Publish and share your first item on the storefront
Your online storefront is a separate tool called Wildfire — click Wildfire in the sidebar (under TOOLS) to open it in a new tab. It has its own login the first time.
Before you publish: if you haven't already, spend two minutes in Store Settings → Setup (payment and bank details, your order WhatsApp number) and Item Categories, so your first product has somewhere to be filed. This pack covers publishing one item — the full setup is in the Merchant Storefront Manual.
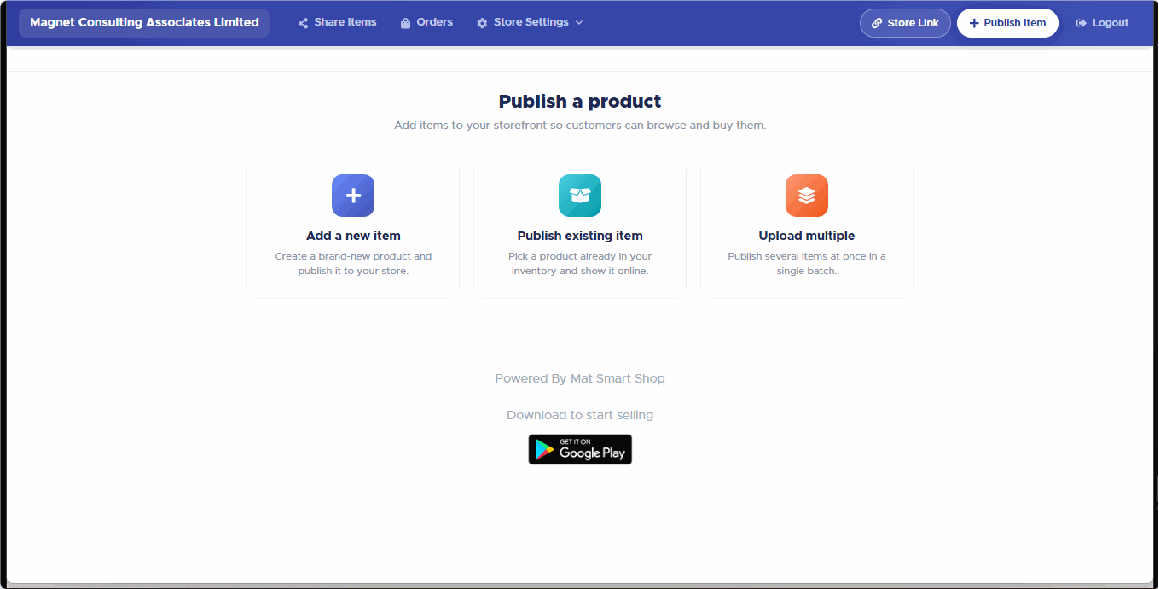
Click Publish Item. You have three routes on — pick Publish existing item since you already created it in Step 4.
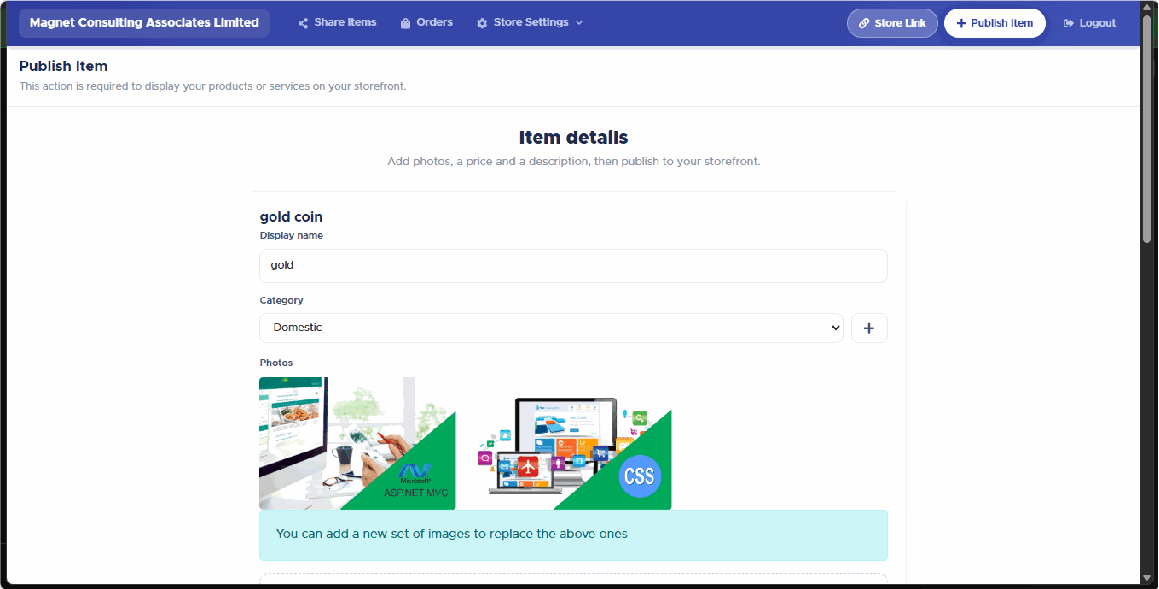
Set the Display name, pick or create a Category, and add photos if you haven't already. Save puts it live.
Now share it. Open Share Items — every published product lives here, each with its own Share button.
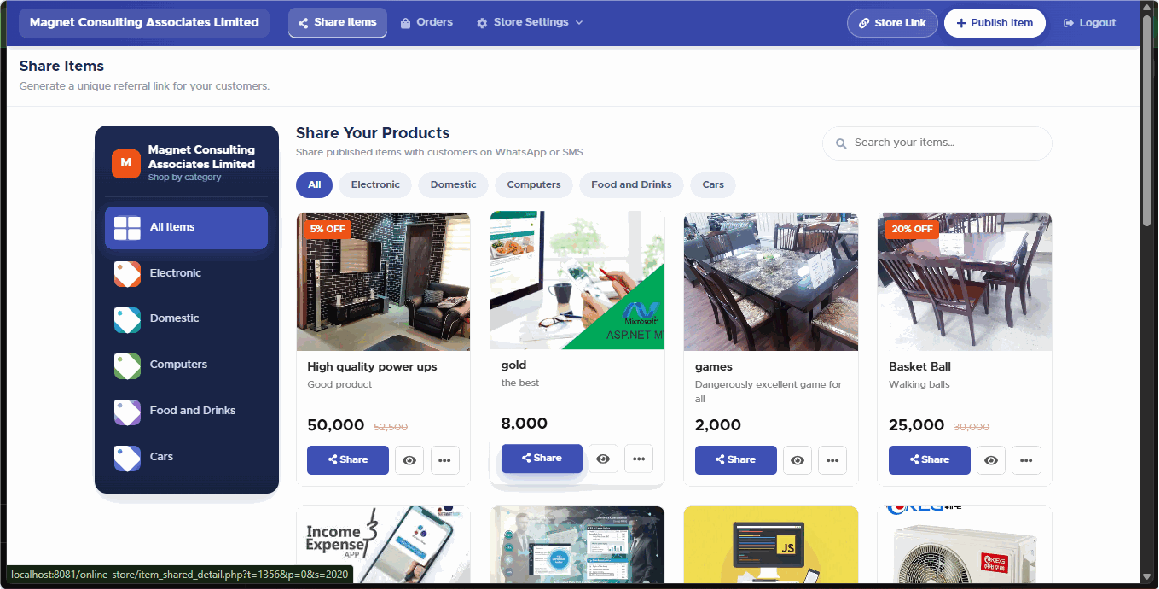
Pick a customer, click the green button — WhatsApp opens with the item link ready to send. You can also click Store Link in the top bar to copy your whole storefront address — one link for your entire catalogue, good for a WhatsApp status or a bio.
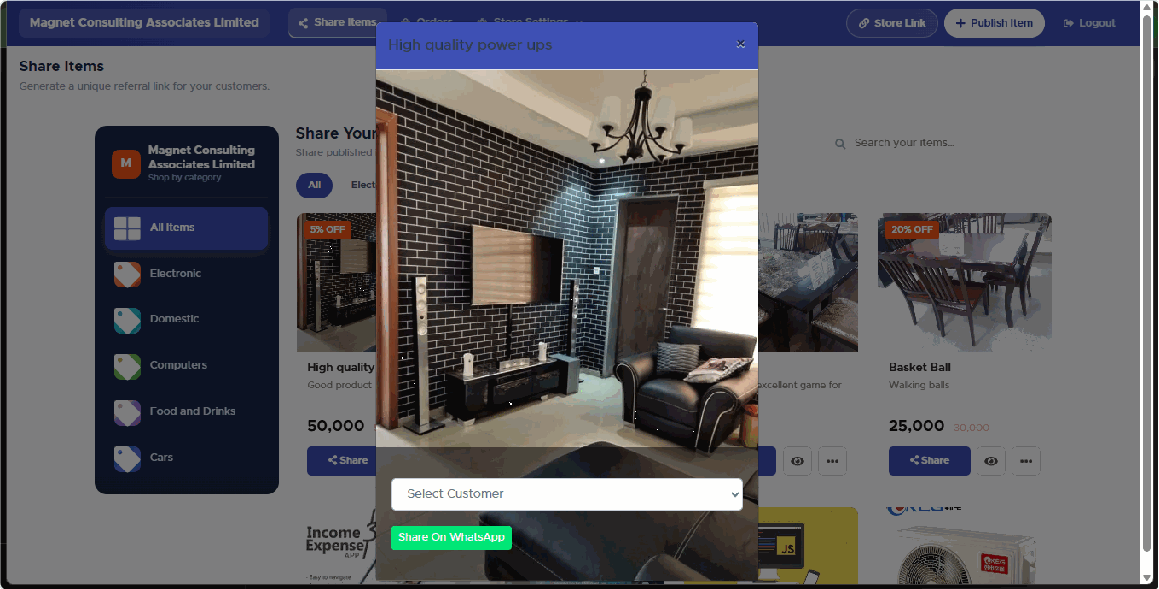
7. Set up your first follow-up SMS
Once you've made a sale or two, Customer Follow-Up (in the sidebar) is how you remind customers who owe you, win back ones who've gone quiet, or thank a first-time buyer. Open it — it lands on the Open Balance tab by default.
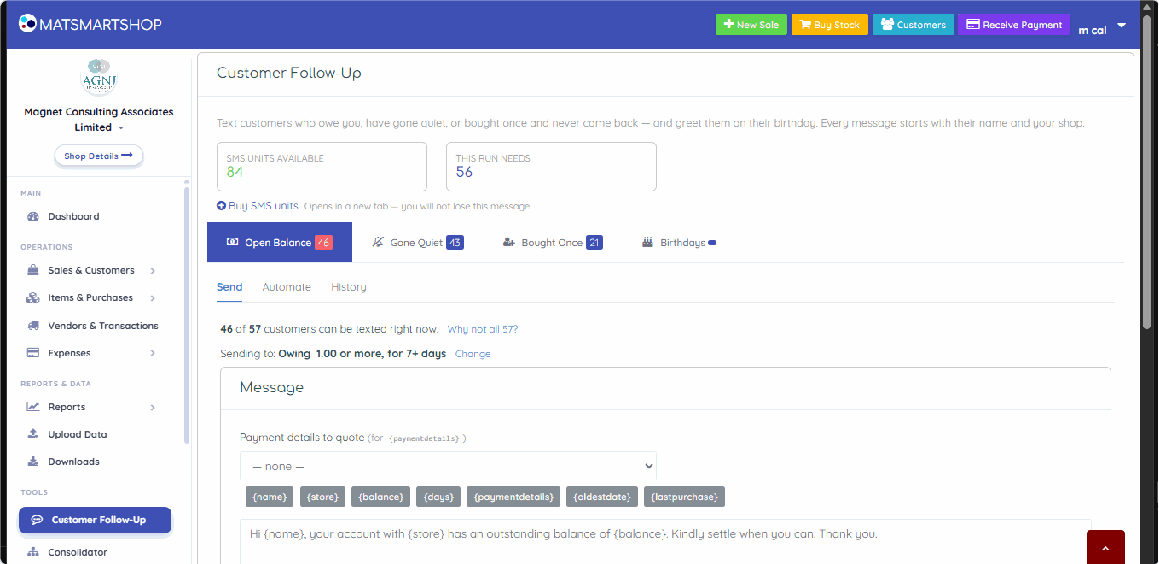
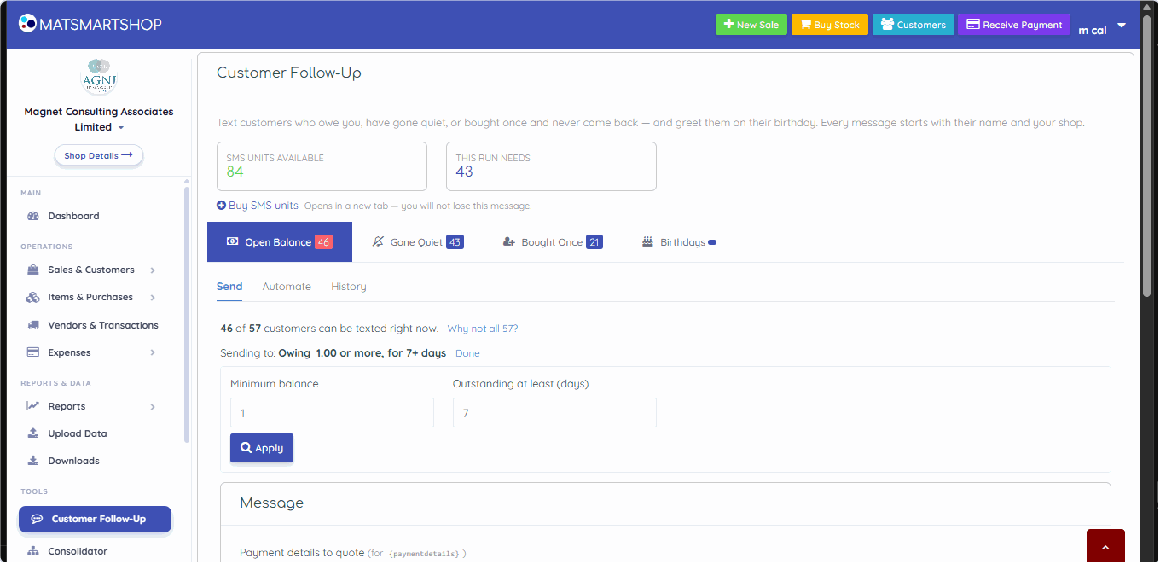
- Click Change on the filter line to set a Minimum balance and how many days it must have been outstanding — this decides who qualifies.
- Write your message, or leave the default. Every message adds a greeting and your store name automatically, so don't write your own opener. Click a token like {balance} to drop in each customer's own figure.
- Check the live preview and the character/page count beneath it — SMS is billed per page, so keep it to one where you can.
- Choose your recipients — Select all, or tick people individually — then click Send now. You'll get a confirmation that restates the cost before anything actually goes out.
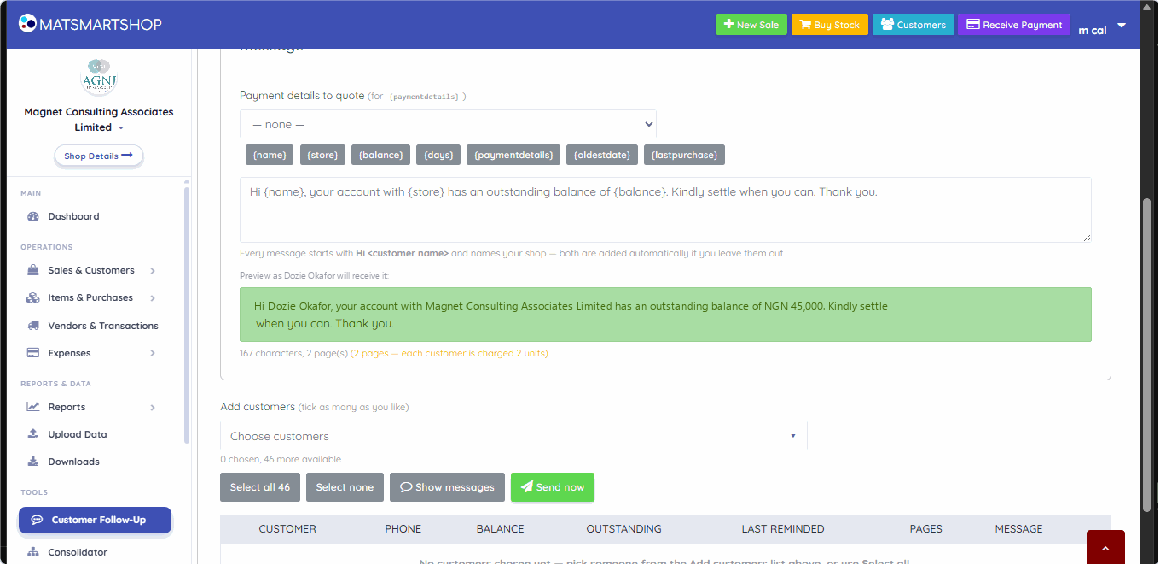
Once you're comfortable sending manually, the Automate sub-tab turns any of the four tabs into a standing job that runs on a schedule — covered in the Customer Follow-Up Manual.
What's next
You've now touched every core screen in the app. For the detail behind each step, these are your companion manuals:
| Topic | Manual |
|---|---|
| Sales, invoices, payments, Customer Center in full | Sales & Customers Manual |
| Items, stock, purchases vs. adjustments, reorder levels | Items & Purchases Manual |
| Bulk-importing items, customers, sales and purchases from a spreadsheet | Upload & Scan Manual |
| Full storefront setup, back orders, orders, and per-item SMS | Merchant Storefront Manual |
| Customer Follow-Up in full, including Automate and History | Customer Follow-Up Manual |
| What your customers see when they open your store link | Shopper's Guide |
| Running the same seven steps from your phone | Android Welcome Pack |